

Before you start
- Generate an OAuth MCP Connector in GetWhys. Copy the OAuth Client ID and OAuth Client Secret. GetWhys shows the secret only once.
Add GetWhys to ChatGPT
1
Enable developer mode
In ChatGPT, open Settings → Security and login and turn on Developer mode.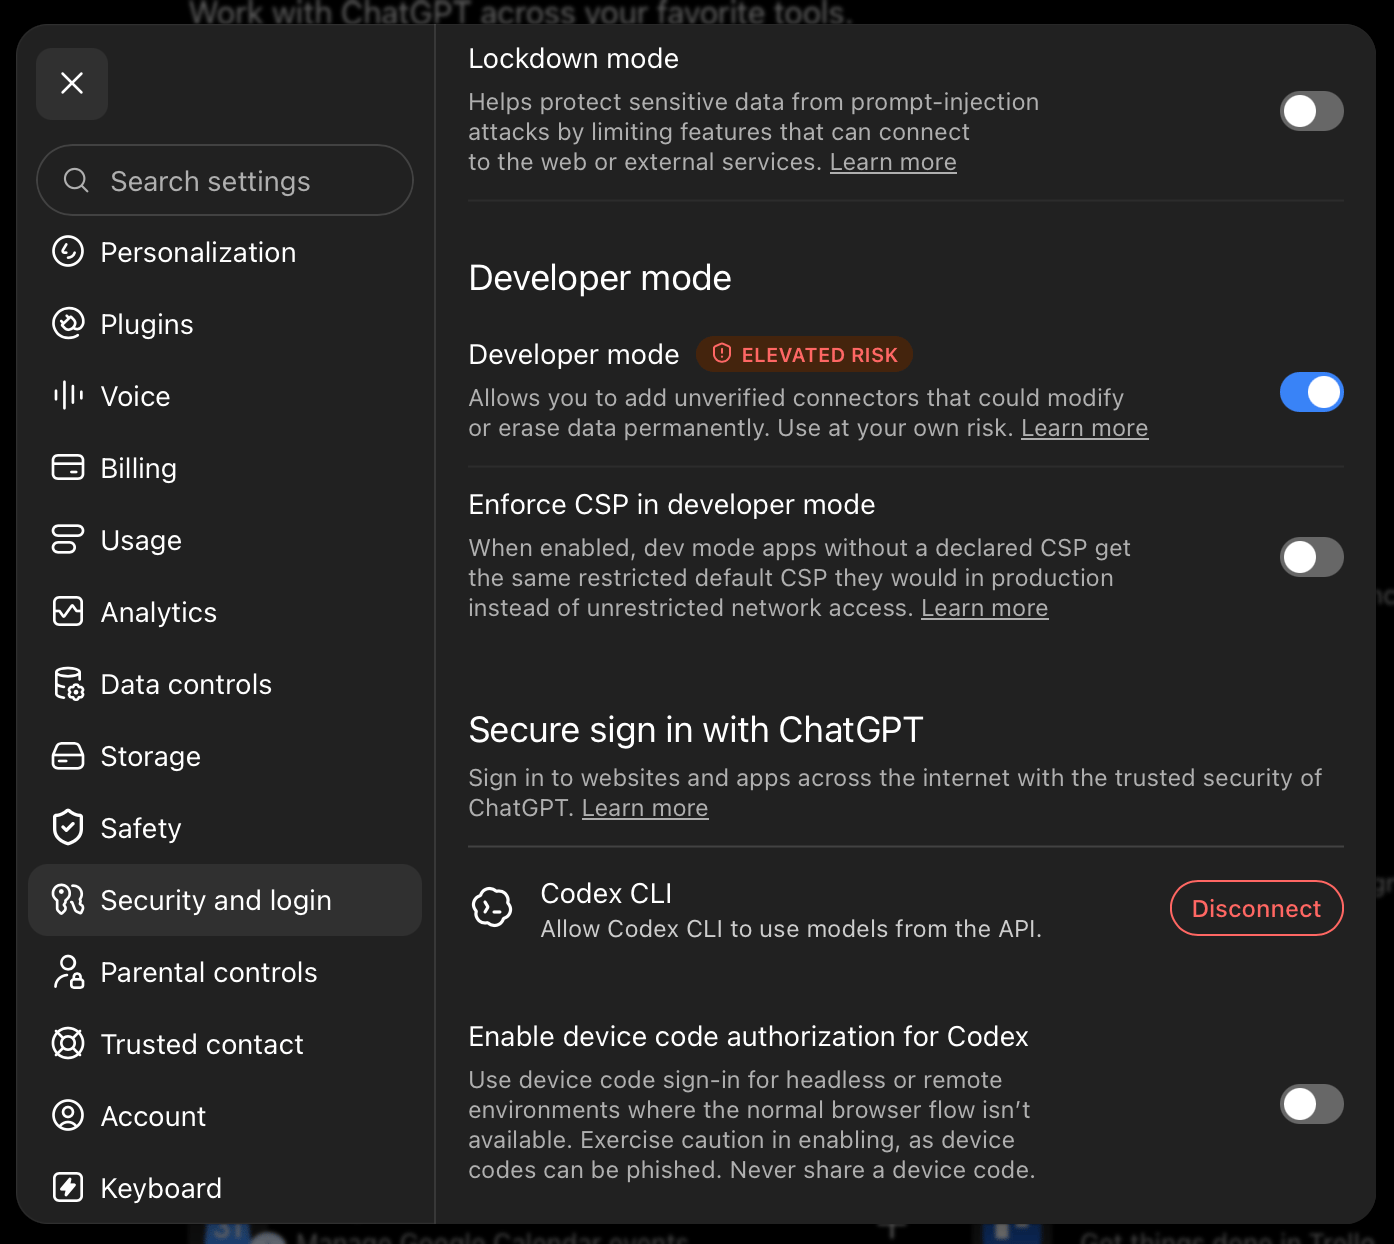
Turn on Developer mode in Security and login settings
2
Open the plugin form
Go to chatgpt.com/plugins and click the + button.
Click the plus button on the Plugins page
If you don’t see the + button, return to Settings → Security and login and make sure Developer mode is on.
3
Enter the GetWhys details
Complete the form with these values: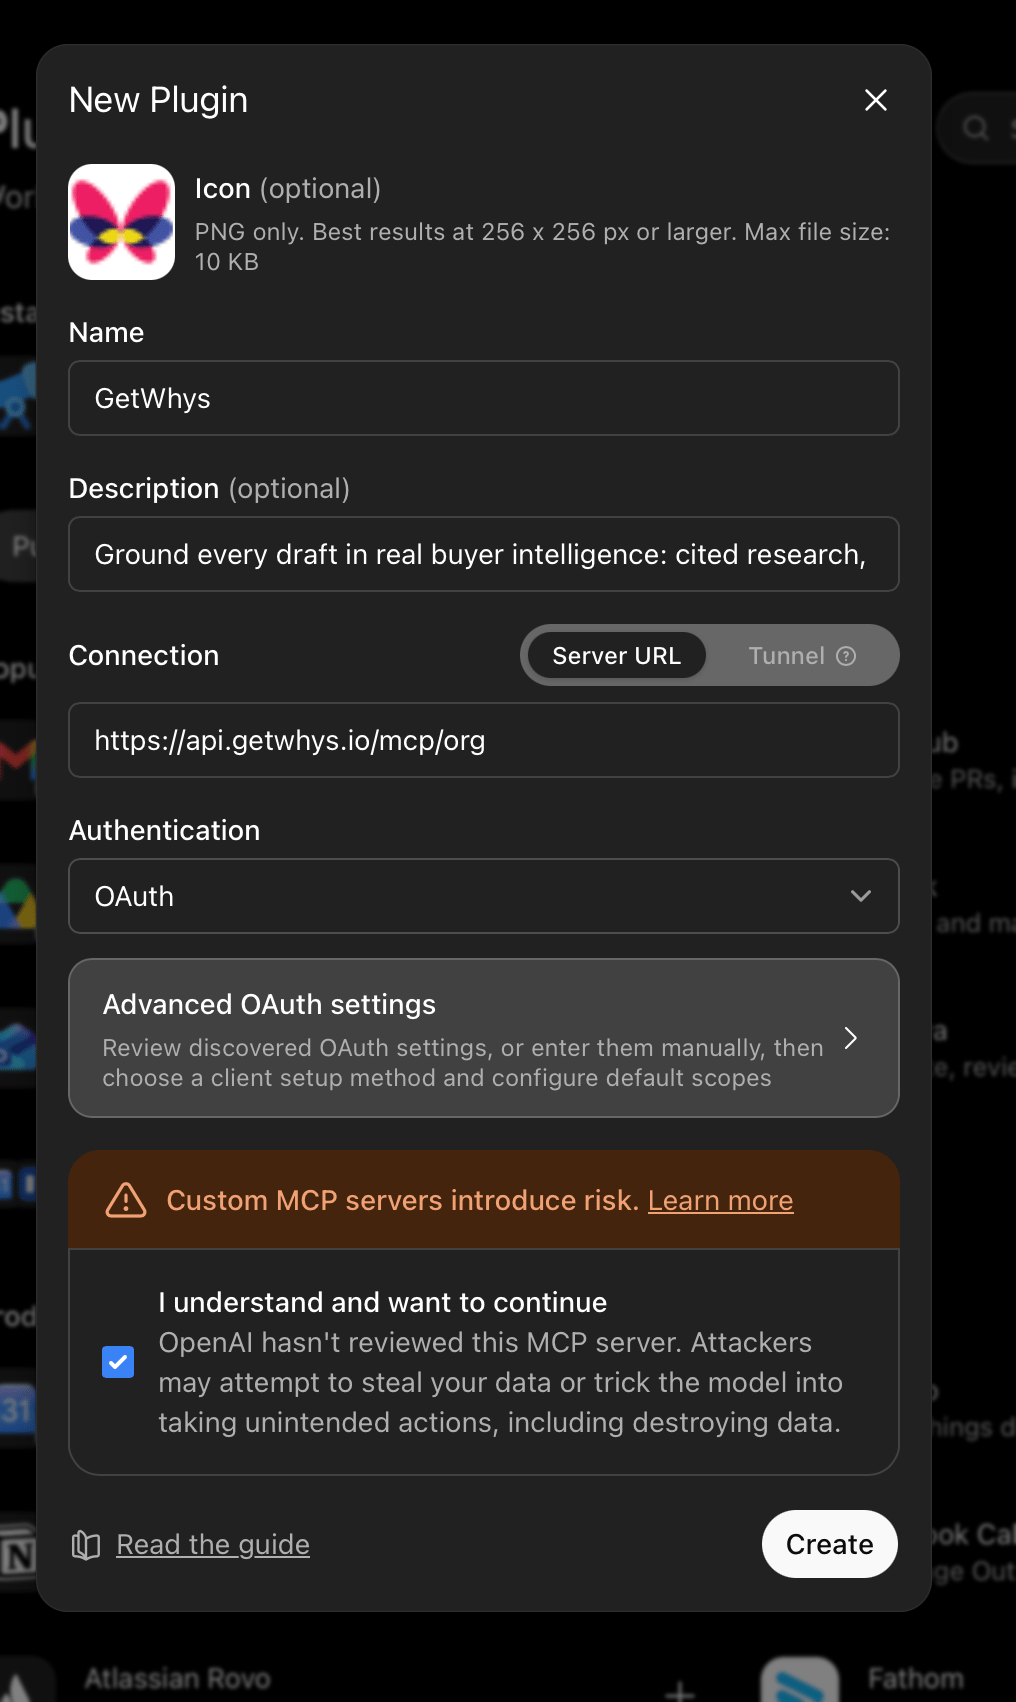
Check I understand and want to continue, then click Advanced OAuth settings.
Enter the GetWhys server details and open Advanced OAuth settings
4
Configure the OAuth client
In Advanced OAuth settings: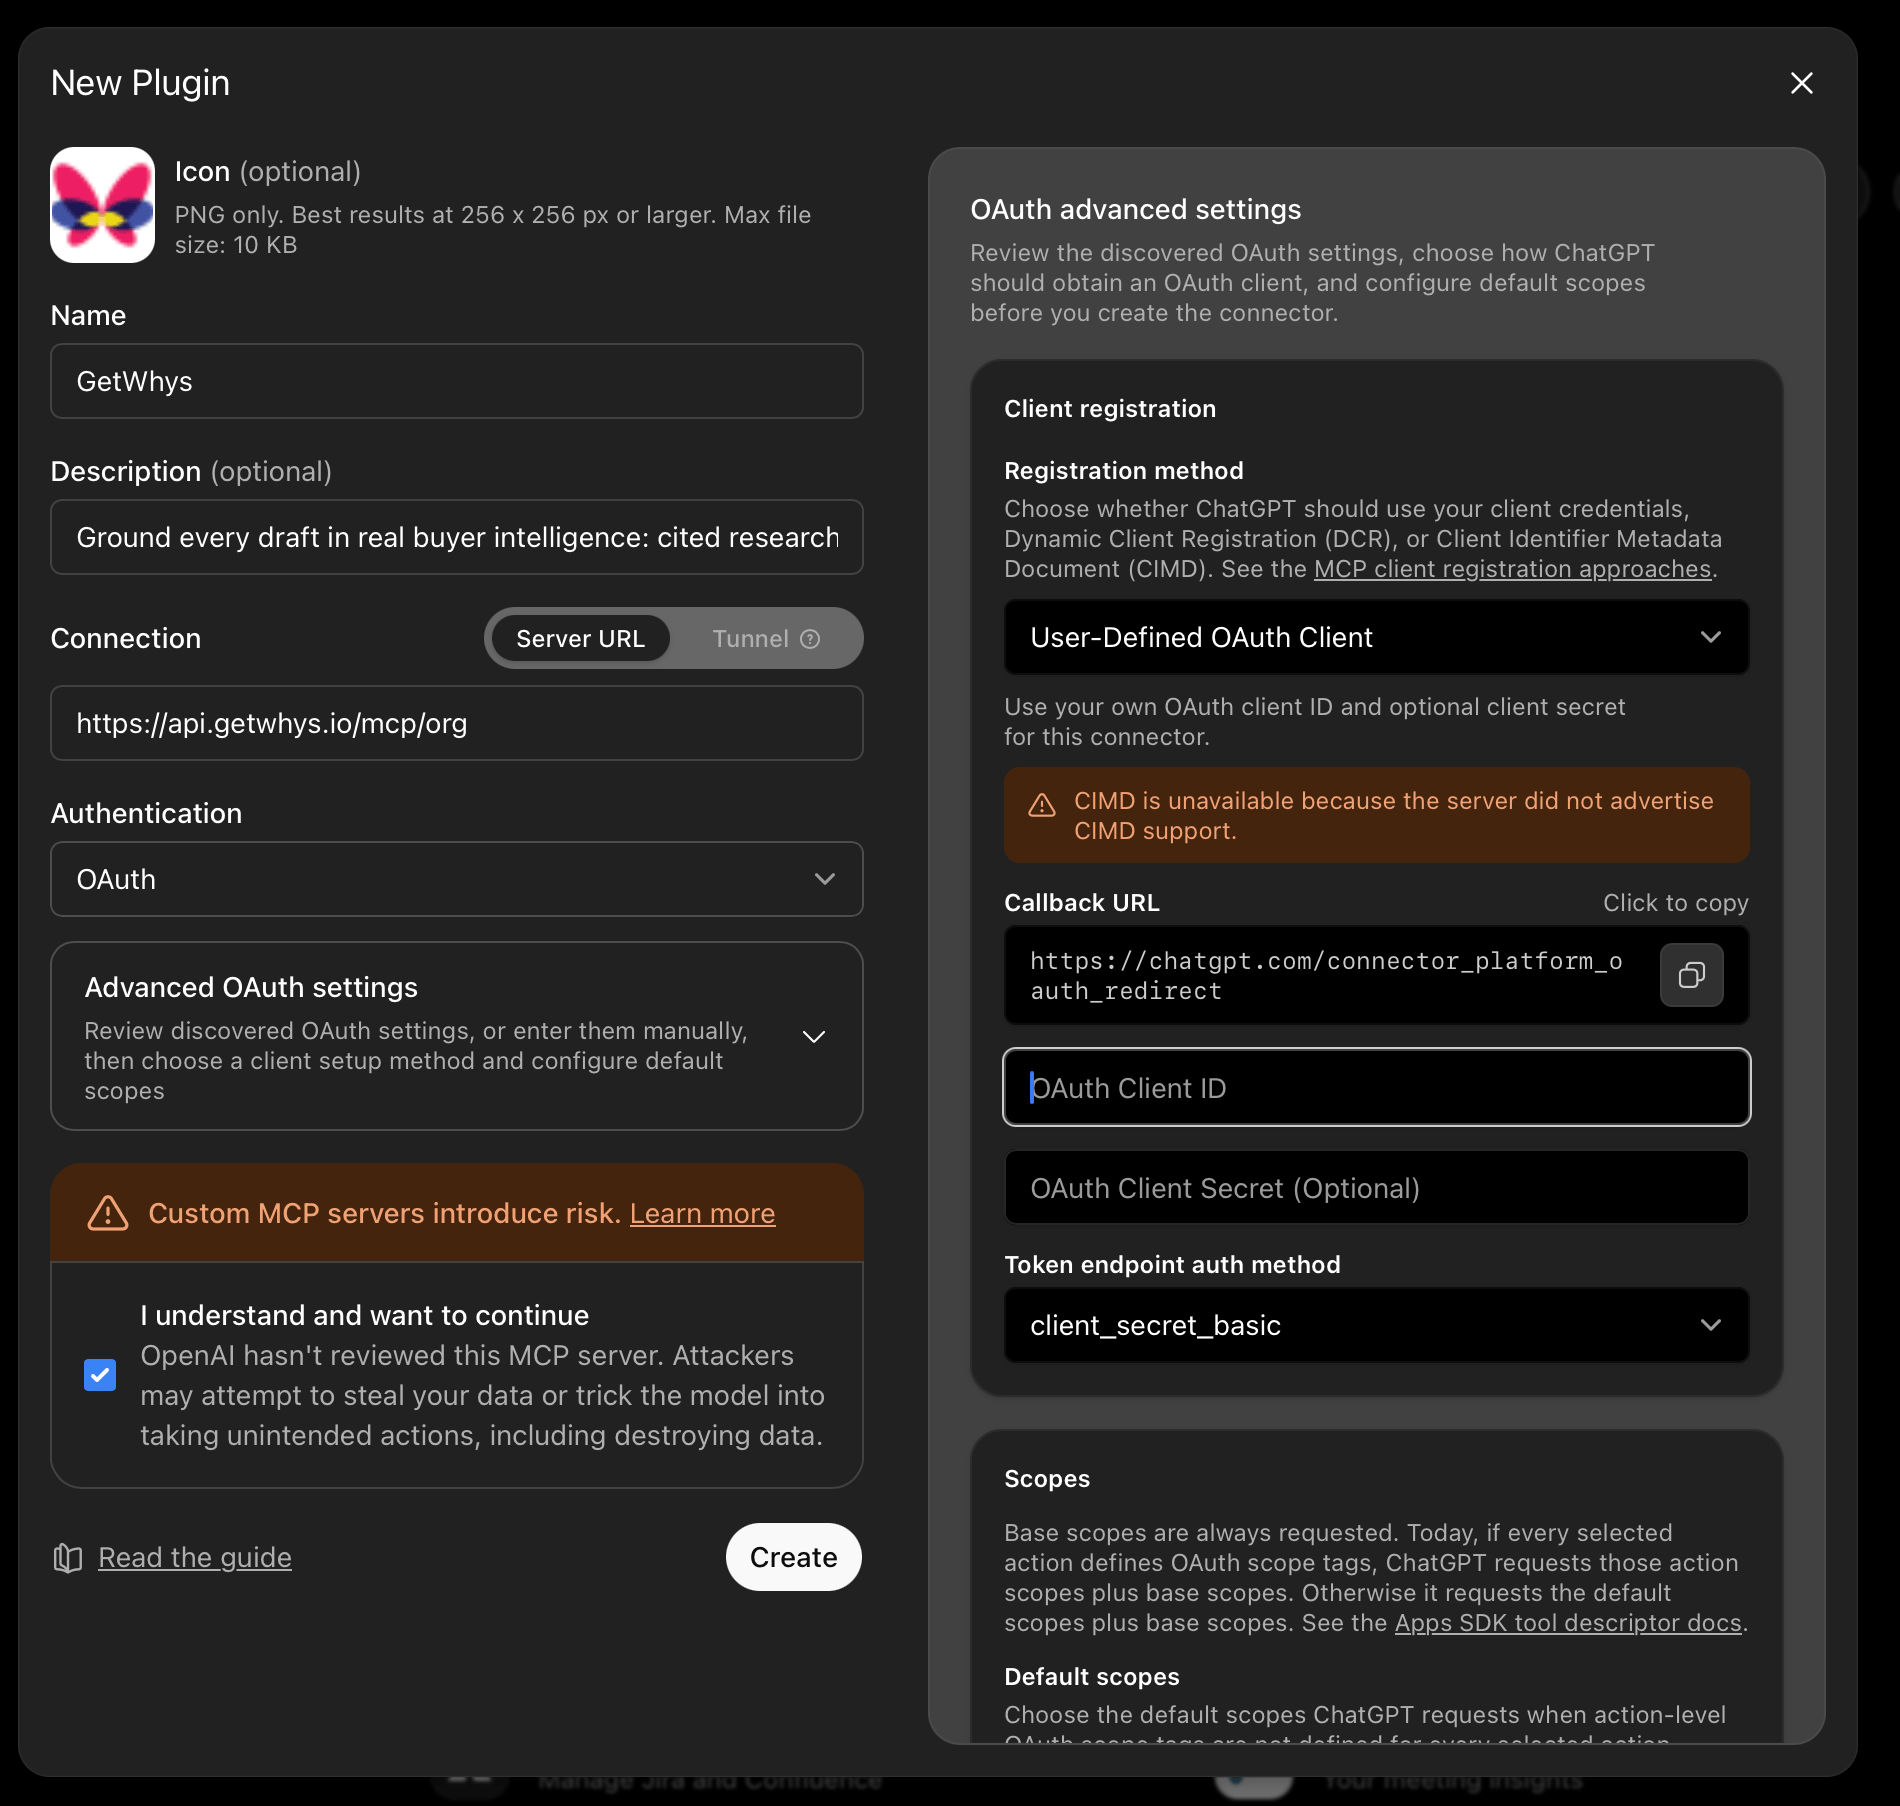
- Set Registration method to User-Defined OAuth Client.
- Enter the OAuth Client ID and OAuth Client Secret from GetWhys.
- Set Token endpoint auth method to
client_secret_basic.
Use the OAuth client credentials generated in GetWhys
5
Create the plugin
Click OK to save the OAuth settings, then click Create.
Verify the connection
Enable GetWhys in the ChatGPT composer, then ask: “Who am I in GetWhys?” If ChatGPT returns your GetWhys organization, you’re connected.Troubleshooting
Developer Mode is unavailable — confirm that your plan supports it and that your workspace admin has enabled it. GetWhys tools don’t appear — open the plugin settings, click Refresh, and confirm the server URL is exactlyhttps://api.getwhys.io/mcp/org.
A tool call returns an authentication error — confirm the client ID and secret, and make sure Token endpoint auth method is set to client_secret_basic.