

Setting up GetWhys MCP
GetWhys connects to AI assistants through MCP (the Model Context Protocol), an open standard that lets any compatible app access outside tools and data. Once connected, your assistant can pull directly from your market research, buyer personas, and messaging frameworks during a conversation.Before you start
You’ll need three things:- An MCP-compatible app — sometimes called an MCP client or host. This is whatever assistant or tool you want GetWhys to plug into.
- A GetWhys account — you’ll sign in during setup to authorize the connection. Your organization needs to be an existing GetWhys customer to use this.
- The GetWhys MCP endpoint (below).
The GetWhys MCP endpoint
GetWhys runs a hosted (remote) MCP server, so there’s nothing to install. You just point your app at this address:Authenticating: header vs. query string
There are two ways to pass an Organization MCP API Token, in order of preference:
Always try the header first. Only fall back to the query string if your client genuinely has no way to set one — a token in a URL is more exposed (browser history, logs, etc.) than a token in a header.
Which setup do you need?
This doc is organized by client, since the steps differ:- Generic MCP client — Cursor, Typeface, custom agents, or anything else not named below
- Claude.ai or Claude Desktop
- Claude Tag (Claude in Slack)
Path 1: Generic MCP client
For Cursor, Typeface, or any other MCP-compatible app not covered by Path 2 or Path 3.Recommended: org-wide via token
1. Generate an Organization API Token- Go to the GetWhys integration settings page:
https://app.getwhys.io/settings/integrations - Scroll to the MCP API Tokens card. If you don’t see this section, contact GetWhys support — you may not have the required permissions.
- Add a label and click Generate.
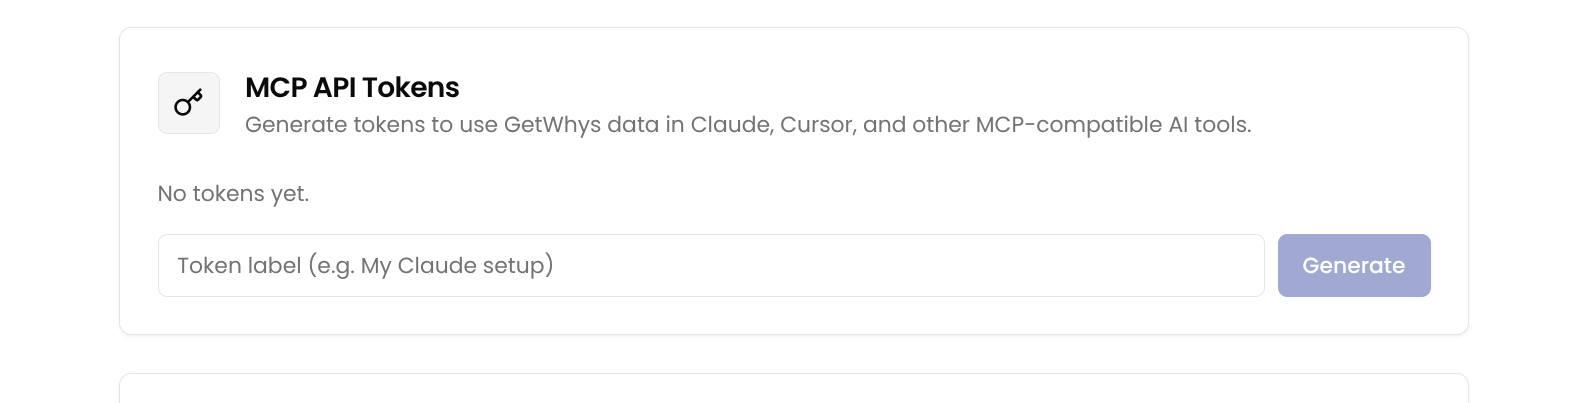
- Copy the token immediately — it’s only shown once. If you lose it, revoke it and generate a new one.
- Server URL:
https://api.getwhys.io/mcp - Auth:
Authorization: Bearer <your-token>header (preferred — see Authenticating above for the query-string fallback if your app doesn’t support custom headers)
Alternative: individual account (OAuth)
Best for one person - not that this will not active the GetWhys MCP connector for anyone else in your organization.- Open your app’s settings and find the section for integrations, connectors, or MCP servers.
- Choose Add (e.g. “Add integration,” “Add connector,” or “Add MCP server”).
- Paste in the GetWhys MCP address:
https://api.getwhys.io/mcp - The app will send you to GetWhys to authorize via OAuth. Sign in with your GetWhys account and approve the connection.
- You’ll see GetWhys listed as a connected/active integration.
Path 2: Claude.ai or Claude Desktop
Recommended: org-wide connector
1. Generate an Organization API Token — see Path 1, Step 1 above. 2. Add the connector Set up a custom connector athttps://claude.ai/customize/connectors → Add custom connector:
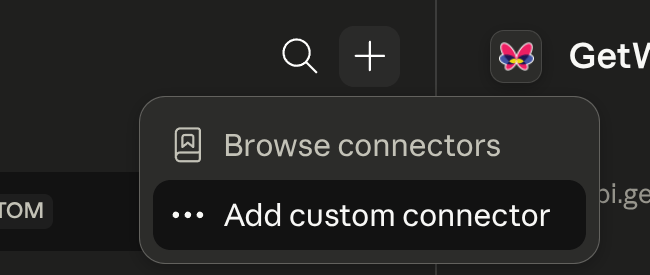
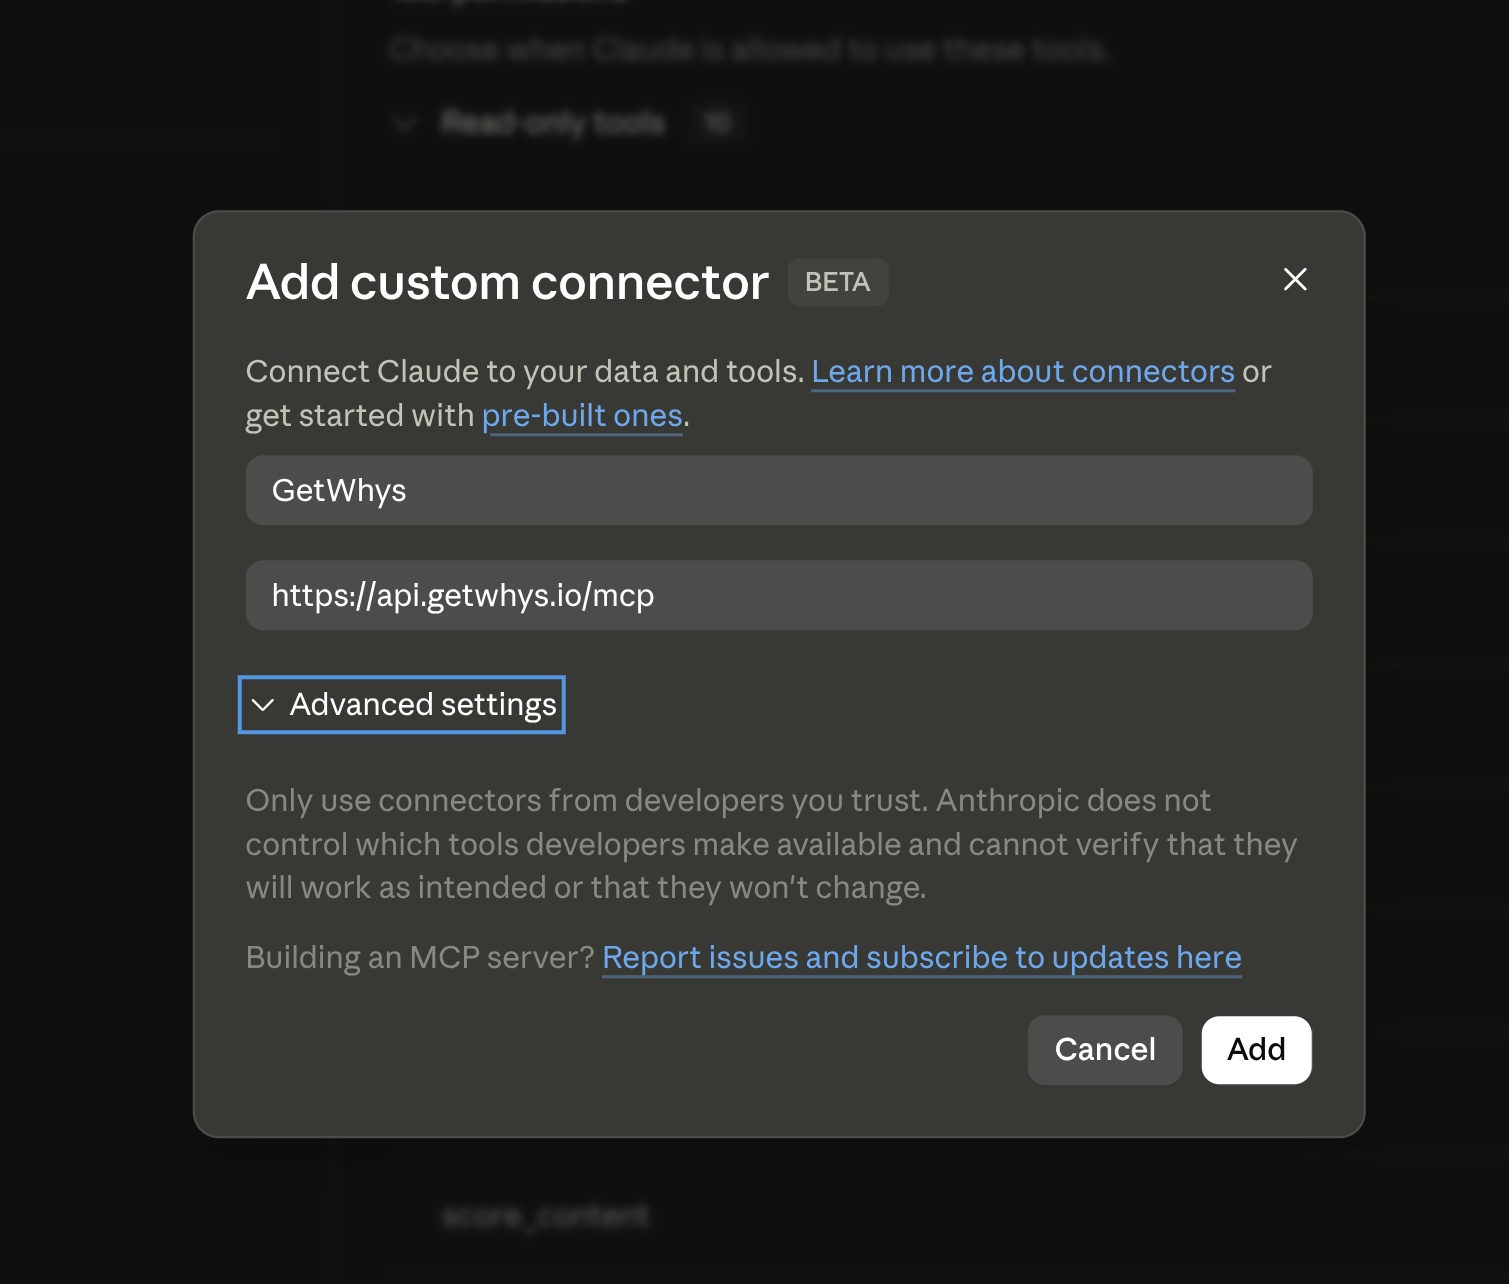
api.getwhys.io, not api.agetwhys.io.)
Alternative: individual connector (OAuth)
Same steps as above, but paste justhttps://api.getwhys.io/mcp with no token — you’ll be sent to GetWhys to sign in and authorize with your own account.
Claude Code CLI
Using your GetWhys user authentication:Recommended: Installing the GetWhys skill for your whole Claude.ai org
GetWhys has limited built-in control over when the MCP gets invoked on its own — it relies on pattern-matching against the request rather than a dedicated trigger. The skill gives Claude precise, consistent instructions for when to call GetWhys tools, what workflow to follow, and how to apply results — this measurably improves how reliably GetWhys gets used. Install it alongside the MCP for every org; don’t treat it as optional. The skill is a companion to the MCP server, not a replacement — it’s inert without the MCP connected.- Download the skill.
Or pin to a specific version:
.../releases/download/vX.Y.Z/validate-gtm-output.zip. You do not need to unzip it — upload the.zipas-is. - One-time org setup (first install only). Log in to claude.ai as an org admin → Organization Settings → Skills → enable both Skills and Code execution & file creation.
The GetWhys skill doesn’t execute code or create files itself — it only guides Claude in calling GetWhys MCP tools. Code execution & file creation is a platform-level prerequisite for Claude’s Skills feature generally, not something this specific skill uses.
- Add the skill. Still under Organization Settings → Skills, find Organization skills → + Add → select the
validate-gtm-output.zipyou downloaded.
Path 3: Claude Tag (Claude in Slack)
@Claude in Slack does not inherit anything from Path 2 — no MCP connection, no skill. It’s a separate surface with its own configuration.
There are two variants. Anthropic is retiring the older one on August 3, 2026 — set up new integrations on Claude Tag.
Claude Tag (current, recommended)
A Claude org Owner/Admin configures this atclaude.ai/admin-settings/claude-tag → Slack tab:
- Pick a scope — the whole org, a single workspace, or a single channel.
- Create an Access bundle (
+next to Access bundles → Create new bundle) and name it (e.g.getwhys). - On the bundle’s Credentials tab, add the GetWhys MCP connection: credential type Bearer, value = your Organization MCP API Token, server URL
api.getwhys.io, path prefix/mcp. - Add the GetWhys skill. For Claude Tag this is not the
.zipused in Path 2 — Tag loads plugins, so upload the plugin package instead:- Download
getwhys-skills.zipfrom the agent-skills releases page: - In claude.ai admin settings: Plugins → Upload plugin → Upload to a new marketplace → name it (e.g.
getwhys) → select the zip → Upload. - In the bundle’s Plugins section, click + and attach the
getwhys-skillsplugin to this scope.
- Download
getwhys-skills.zip to the same marketplace; updates apply to new threads only.
💡 Access bundles are provisioned separately from any connector an individual set up on their own Claude.ai account — this step is required even if GetWhys is already set up via Path 2. New threads pick up the change; existing threads keep their previous configuration.
Legacy “Claude Code in Slack” — migrate before August 3, 2026
If you’re still on this path: each@Claude coding request runs as a Claude Code session under the individual user’s own Claude.ai account. Skills a user has enabled on Claude.ai are expected to load automatically into these sessions (verify — behavior has been observed to vary), and the MCP server is not inherited — it needs to be declared in the target repo’s .mcp.json or added as a per-session connector.
Plan to move to Claude Tag above ahead of the August 3 cutover rather than investing further here.
Verifying the connection
Once connected, confirm it’s working by asking your assistant:“Who am I in GetWhys?” — or — “Check my GetWhys connection.”This runs the
whoami tool and returns your workspace details. If you see those, you’re connected.
Authentication & permissions
GetWhys connects via OAuth — users sign in with their existing GetWhys credentials, and the connection grants access scoped to their organization’s workspace, including personas, messaging frameworks, brand voice, and the research corpus. GetWhys can also connect via an MCP token generated within the authenticated GetWhys context. This is the better option for whole-organization access, and grants the same access as OAuth authentication.Security, data access, & privacy
All data transmitted through the GetWhys MCP is encrypted in transit and at rest. Access tokens are handled server-side and never exposed to the client. Tokens are scoped to your user and organization — treat them like passwords:- Don’t commit them to source control.
- Don’t share them across teammates — generate one per person or per agent.
- Rotate them periodically and after any device change.